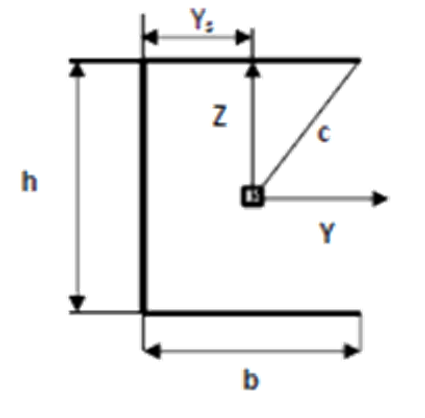
U weld stress check according to RCC-M code

Description
Check of U shape welds according to RCC-M allowable stresses.
RCC-M (Règles de Conception et de Construction des Matériels Mécaniques) is a French nuclear mechanical design and construction code primarily used for pressurized water reactors (PWRs). It provides rules and guidelines for the design, fabrication, and inspection of mechanical components, including welded joints.
Checking U-shaped welds (also known as J-shaped or partial penetration welds) according to RCC-M allowable stresses involves the following steps:
-
Identify Applicable Sections: Refer to the relevant RCC-M sections and sub-sections that provide guidelines for the design, fabrication, and inspection of welded joints, such as Section III for design, Section IV for fabrication, and Section V for non-destructive examination (NDE).
-
Weld Geometry: Define the weld geometry, including the weld size, throat thickness, and weld angle, following the RCC-M guidelines. This information is essential for calculating the stresses acting on the weld.
-
Material Selection: Select the appropriate welding materials and base materials according to the RCC-M guidelines. This includes ensuring compatibility between the base materials and filler metals and considering factors such as mechanical properties, chemical composition, and environmental conditions.
-
Load Cases: Identify the load cases and load combinations that the welded joint will be subjected to during its service life, such as mechanical loads, thermal loads, and internal pressure. Combine these loads as per the RCC-M requirements to obtain the design loads.
-
Stress Calculation: Calculate the stresses acting on the welded joint, including normal stresses, shear stresses, and bending stresses, based on the design loads, weld geometry, and material properties. This may involve using analytical methods, numerical simulations (e.g., finite element analysis), or empirical formulas.
-
Allowable Stresses: Determine the allowable stresses for the welded joint based on the RCC-M guidelines, considering factors such as material properties, safety factors, and operating temperature.
-
Stress Comparison: Compare the calculated stresses to the allowable stresses specified by the RCC-M code. If the calculated stresses exceed the allowable stresses, the weld design is not adequate, and modifications may be required, such as increasing the weld size, changing the weld geometry, or using different materials.
-
Non-Destructive Examination (NDE): Perform the required NDE, such as radiographic testing, ultrasonic testing, or magnetic particle testing, following the RCC-M Section V guidelines to ensure the quality and integrity of the welded joint.
-
Welding Procedure and Welder Qualification: Establish and follow approved welding procedures and ensure that welders are qualified according to the RCC-M guidelines to achieve the desired weld quality and performance.
In summary, checking U-shaped welds according to RCC-M allowable stresses involves identifying the applicable code sections, defining the weld geometry, selecting materials, identifying load cases, calculating stresses, determining allowable stresses, comparing stresses, conducting non-destructive examination, and ensuring proper welding procedures and welder qualifications. Ensuring that welded joints meet RCC-M requirements is crucial for maintaining the safety and reliability of nuclear power plant components
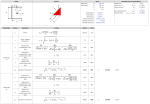
Calculation Preview
Full download access to any calculation is available to users with a paid or awarded subscription (XLC Pro).
Subscriptions are free to contributors to the site, alternatively they can be purchased.
Click here for information on subscriptions.

