This analysis considered the structural performance of the dummy pod as it moves around the wheel in combination with exceptional wind loads experienced 140m above the ground. The structural assessment of the dummy pod considers the stress in members, the buckling of members, the stress in welded connections and the performance of bolted joints. This article describes a finite element analysis study supported additional calculations which are available for download from the www.ExcelCalcs.com site.
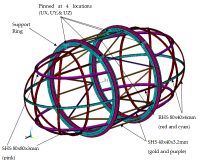
The Detail - The dummy pod is constructed from two end sub-assemblies called thimbles and a central cylindrical sub-assembly called the barrel. The assemblies are fitted to a support ring. A bolt passes through the thimble end plate, through the support ring and through the barrel end ring. 32 M20 bolts per support ring are used around the circumference to connect the parts together. The support ring is fixed in three directions at the pin locations.
An ANSYS finite element model is constructed from beam elements. Stresses are determined by linear elastic analysis and Euler buckling analysis is also performed. There is no particular code of practise applicable to the London Eye dummy pod. BS2573 Part 1: 1983 “Rules for the Design of Cranes” is selected as cranes are mechanical structures subject to wind and self weight loads. It is not a limit state code and requires elastic assessment of the structure. It is similar to BS449 in its methodology. The basic allowable stress is 60% of the material yield (unless limited by buckling considerations). A fatigue assessment is not considered necessary due to the low number of cycles. The model has assigned the material density of steel multiplied by 1.2 as an impact factor. All material is S355 steel with a yield stress of 355MPA. A number of load combinations were considered.
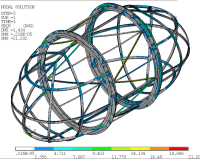
How to read ANSYS plots: The “STEP” number (and “TIME” number) is a load step (e.g. self weight, wind load…). A “SUBSTEP” is of interest for nonlinear analysis but since this assessment is linear elastic so it is not relevant in this case. “SEQV” indicates that we are plotting equivalent stresses (or Von Mises Stress) in MPa. For beam elements SEQV is the addition of the axial stress and the bending stress in two planes. The stress is displayed at all points around the beam section. SEQV indicates the stress magnitude but not the sense (compressive or tensile). “SMN” gives the lowest value of SEQV in the plot and “SMX” shows the highest value. The stress legend shows how colours can be related to the value of equivalent stress in the plot. “DMX” is the maximum vector displacement in the model (in mm).
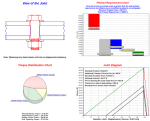
The worst axial force and the worst shear force are incorporated into a
detailed bolt assessment. The calculations check the following:
1) The joint axial strength.
2) The joint preload is sufficient to withstand the applied shear load even after embedding losses and bolt relaxation.
3) The tightening torque requirement.
4) The joint force diagram.
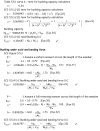
Eigenvalue buckling analysis can be performed by ANSYS. Eigenvalue buckling analysis predicts the theoretical buckling strength (the bifurcation point) of an ideal linear elastic structure. This method corresponds to the textbook approach to elastic buckling analysis: for instance, an eigenvalue buckling analysis of a column will match the classical Euler solution. However, imperfections and nonlinearities prevent most real-world structures from achieving their theoretical elastic buckling strength. Thus, eigenvalue buckling analysis often yields unconservative results, and should be used with caution. However if the Euler buckling load shows a large margin it is very unlikely that effect of real world imperfections will compromise the structures resistance to buckling. In addition members are assessed against the requirements of Eurocode 3.
 Input: Preliminary drawings supplied by client. Input: Preliminary drawings supplied by client. |
 Deadline: Two weeks after purchase order. Deadline: Two weeks after purchase order. |
 Output: Design change recommendations and a calculation report for final design suitable for third party scrutiny. Output: Design change recommendations and a calculation report for final design suitable for third party scrutiny. |


